For many years there has been a tendency to adopt an "open plan" layout for the main social space of a house.
In an open living room, the barriers that divide rooms such as walls and doors have been cut down, which usually has the effect of connecting the space to the kitchen and the dining areas. That said, not all homes lend themselves to this fashionable trend.
You must "listen" or "feel" the house to see what will suit it, rather than force it to be what it does not fit. Some of the biggest mistakes made during renovations result from a poor floor plan choice – this mostly happens when people do not understand the space requirements for open planning or how to design the space for its use.
If you feel that the right choice for you and your property is to open the show, it is essential that you understand the correct process to follow to do it and the effect of training that this will have on other parts of the house. , such as the kitchen and the dining room. The last thing you need is to remove a structural wall incorrectly or to work without permission from the board, which will not blow up your budget and will not cause security problems, but could prevent you from spare! Here's how to do things correctly.
THE PROJECT: SALON
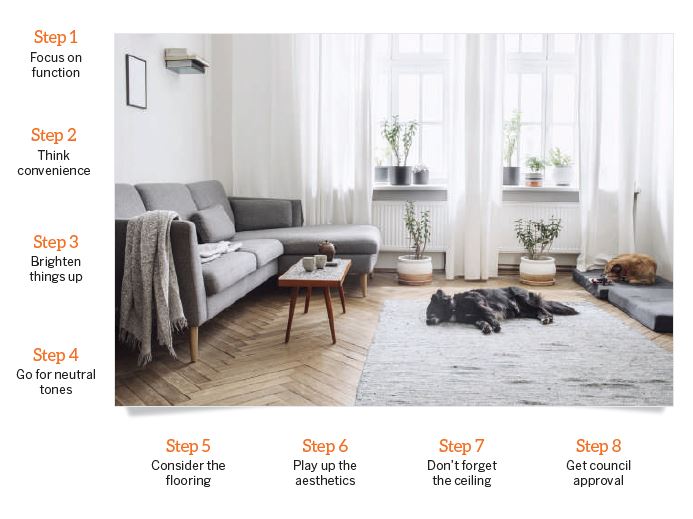
FIRST STEP: FOCUS ON FUNCTION
Having an open living space creates more space, which can prove very useful if your property is cramped.
"Small houses usually have only one living room, which means that the decision has to be made according to the kitchen space, the layout and the use of the house. In these situations, the more general the renovation is, the better, "says Shannon Burke, founder of Perth Renovation Projex.
"Very often, such rooms are used for watching movies, but also for socializing or for entertainment, so the purpose of the game is to create a space that can be converted at the request of the occupants."
TIP
Lighting is an important factor when creating the desired ambience for a room. Downlights evoke warmth and friendliness and are perfect for a space designed for entertainment and relaxation!
STEP TWO: THINK CONVENTION
In opening a living room, a popular trend is to connect it to the kitchen and the dining rooms, which greatly facilitates the entertainment of the guests.
"You can stay connected while you prepare the food, and you do not feel isolated to do the dishes," says Burke.
"You can stay connected while you prepare the food, and you do not feel isolated to do the dishes," says Burke. On a typical day, it means you can watch your favorite cooking show while you prepare a meal. And if you have kids at home, an open-plan living area lets you keep an eye on them without sacrificing your time in the kitchen.
TIP
The flow is crucial in an open layout because you want it to look like a natural connected space rather than a number of different areas without walls. Coherent ground is an easy way to connect parts.
STEP THREE: EXPLORE THINGS
The lighting does not come only from light bulbs but from Mother Nature. Having beautiful and large windows will brighten the room and add to the illusion of space in your interconnected open space.
However, you may still want to be able to adjust the lighting during the day without giving up the natural glow of the sun. This is where a good set of blinds comes in.
"There are so many types of blinds available, and depending on whether you're covering windows or doors, that can affect your decision," says Burke.
TIP
Veri Shades is a combination of blinds and fabric curtains. You can stretch the fabric like a curtain or adjust the opacity with a wand. They are perfect for sliding doors.
Fourth step: opt for neutral tones
The color of the walls contributes greatly to setting the tone of the living room. Burke therefore recommends using clear shades, especially if you are not yet sure of the function of the space.
"If you do not know that your living room or living room will only be used as a theater, keep the white ceilings. The use of deep tones can create a feeling of warmth and comfort, but can also give the impression that a small space is big, "she says.
Grays are perfect for a classy feel that goes with most aesthetics, while whites provide more warmth.
TIP
Characteristic walls can be an excellent design element that distinguishes the living room from other spaces without the need for a wall. Burke suggests painting the wall of functions just a little darker or choosing a dark color.
STEP FIVE: CONSIDER THE FLOOR
A good carpet or rug can make all the difference in an open living room, especially if you want to create a different atmosphere while maintaining consistent flooring in all connected spaces.
"I believe in the three-story rule: there are only three different types of floors per house. Essentially, if you have tiles in the bathroom and carpets in the bedrooms, there can only be one type of floor covering running in the main rooms of the house, "Burke says. .
"If you opt for a warm, theatrical or formal lounge, you can play with the optional rug."
TIP
Instead of the carpet, Burke says that "keeping the original boards or what goes through the main part of the house and using a rug is always a cheaper and versatile option."
STEP 6: PLAY THE AESTHETICS
In an open configuration, the living room being connected to other parts of the house, it is important to give each space its own identity. If you work in an old house, you may have a fireplace that could be the ideal base for adding decorative elements as part of the design of the room.
"In old houses, you can have an existing fireplace to navigate your project. You can highlight it with thumbnails or feature colors, "explains Burke.
Chimney tiles can be purchased in a variety of unique designs, each of which can be the central decorative element of the living room.
TIP
Chimney tiles should not only be used for a chimney – they can also be used to decorate a bare wall. Get creative and use decorative tiles to brighten a plain background.
STEP 7: DO NOT FORGET THE CEILING
Removing a wall goes well beyond its cost, there are many other factors to consider.
"This includes potential damage to the current ground; epic dust; a wet cut in the house to cut the wall, render and set white once the wall is removed to mix the cut. Let's not forget the new gyprock for the ceiling, matching the parts, "says Burke.
"Ceiling joists can tilt over time, often because of their green installation. This means that when you reach the ceilings, you can find yourself at different heights. "
TIP
"A standard cornice is excellent if you open the room; if not, try a decorative molding cornice to define the room! Says Burke. "This choice will depend on the degree of occupation of your design."
STEP EIGHT: APPROVAL OF THE COUNCIL
With such a major renovation on your costs, you must make sure that you get approval from the local council. The application requirements that you must prepare are the details of the proposed changes, including the layout and updated floor plans. It is also advisable to obtain a certificate of conformity from the design of a building expert.
One of the reasons why wall removal is such an important renovation is that it may involve some electrical work.
"Before you start, it's important to think about electrical points, because some of your electrical devices may require a wall to be continued," says Burke.
TIP
Power boards with long extensions give you adequate access to electricity even if the number of outlets in the room is limited. Power tables with surge protection are ideal for preventing damage.
CASE STUDY
Shannon Burke's latest project gave him the "ideal candidate" for a complete renovation.
"The property was neat, tidy and in its original state at 20 years old. The idea was to take a sober and basic property and rebuild it according to the standards of management with a potential for blocking and departure ",
Burke made changes such as adding full height tile, stone tops and built-in closets, but for her, the "real magic" of the renovation lay in the plan. modified floor of the living room.
"The house had a very large living space compared to its actual size – almost the first half of the property was a very large semi-open living room. Yet three meters further on were the dining room, the kitchen and another living room. "
Before
After
To maximize this gigantic space, Burke turned part of the front living room into an official living room.
"The mood and intent of the front lounge was like an adult retreat; a place to have fun or just watch rugby with some cold weather, "she says.
"I decided to take the current window to make it a French door. This connected the private courtyard just outside to the inner space. I always advise connecting indoor and outdoor spaces in the living rooms, as much as possible, to increase the space and create a flow. "
However, this change is problematic because a delayed order has ruined Burke's program.
The French doors ended up being five weeks away from the order, which meant I could not get the official lounge carpet the way I wanted it. It also meant that the painters could not finish because the plaster was not finished. Not ideal at all! "She says.
Before
After
In the back parlor, Burke removed the clumsy floor plan and connected this area to a formal dining space. Structural change meant that she also had to redo the ceiling to maintain support, but her efforts had paid off.
"With more modern homes reflecting an open living space and more versatile spaces, this home could accommodate a more modern design. I would say that the money spent on this renovation would equate to the increase in value! "